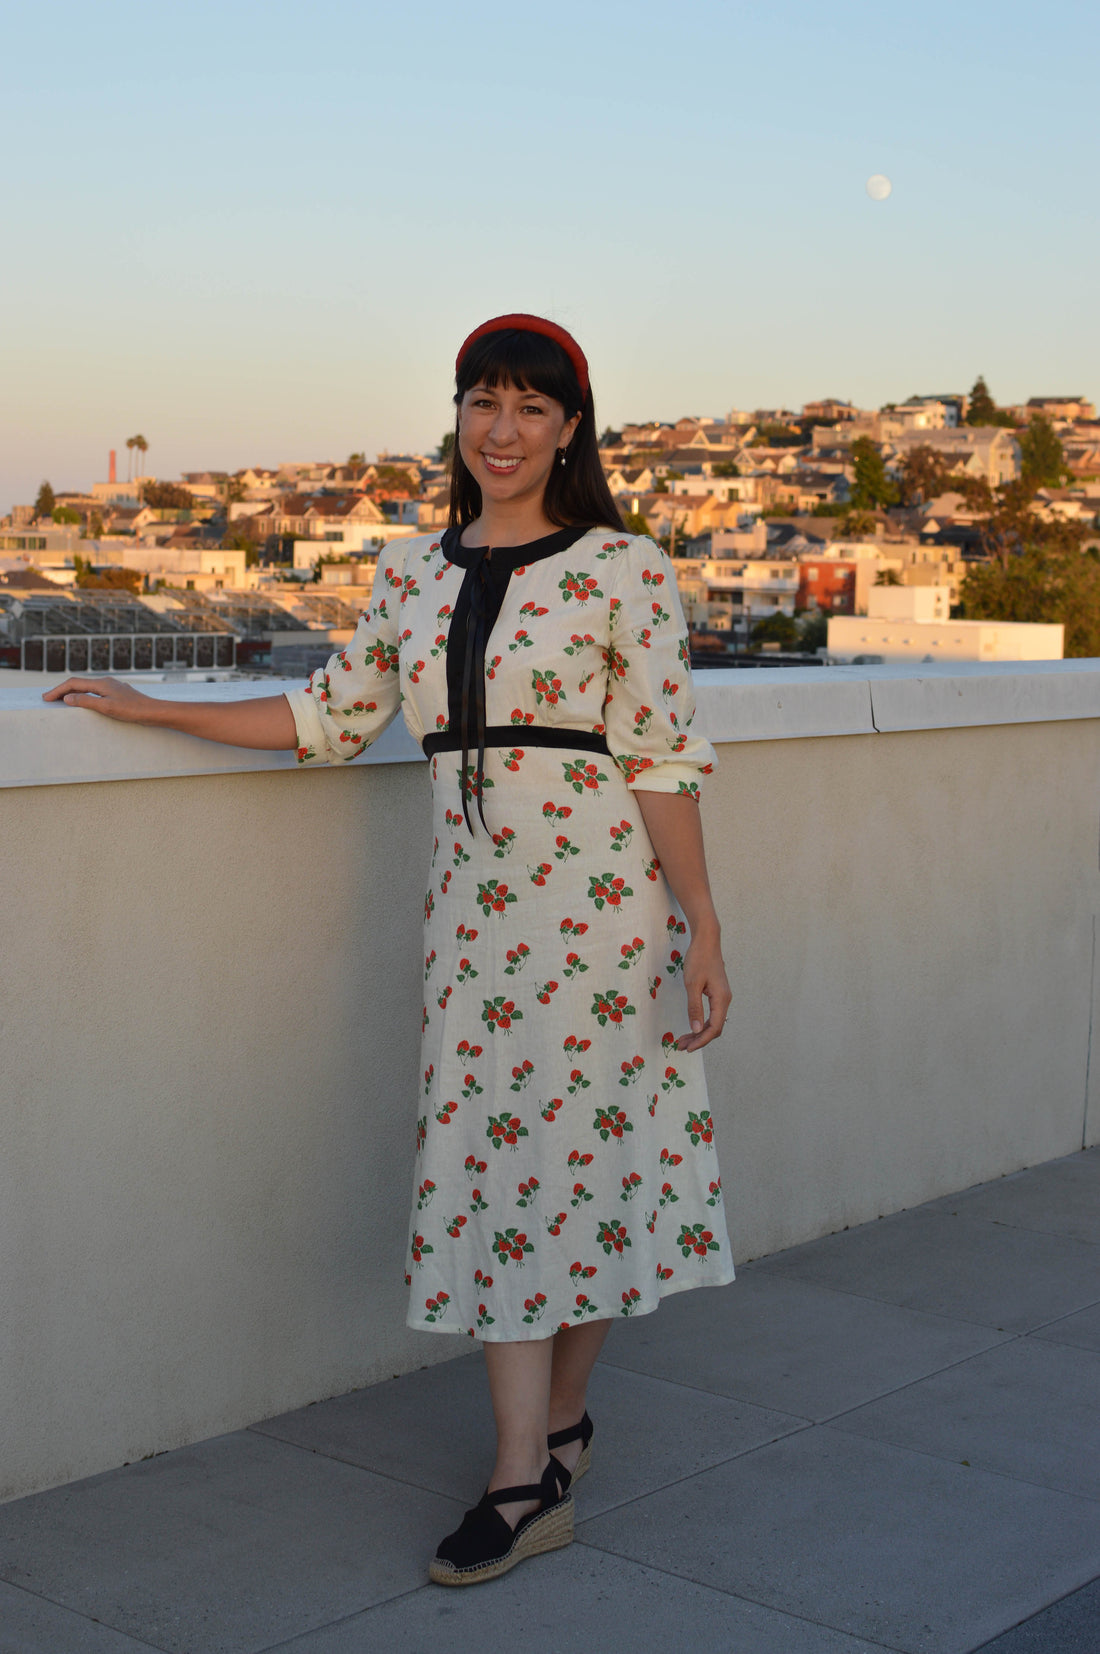
This dress is directly inspired by one I saw in Rixo a few months ago. Since then I’d been searching for the right fabric to pair with a bold contrast band; when Fabric Godmother released this strawberry-print linen right away I knew I’d found the one. I love the slightly unexpected pairing of deep black with the delicate, floaty strawberry print.
It’s amazing how small changes can completely change the look of a pattern; this is the most drastic Park Lane hack I’ve done to date, but it required only one pattern piece change. Firstly, I graded from my usual size 10 to a size 8 at the waist, to give the dress a more cinched-in look. Then, instead of cutting the front bodice pieces on the fold, I added a seam allowance down the centre front and cut a pair. So far, so easy. Figuring out the decorative band was a little trickier, not least because I opted to work with some scraps of sandwashed silk I had left over from making a (disastrous) slip dress.
I traced off a band along the top of both of the skirt pieces, front and back. Then I added a seam allowance to the bottom of the bands. I pressed under the seam allowances, basted the bands in place and then simply top-stitched the bottom edges down.

The front bodice was constructed by firstly facing the CF edges with two straight bands with a pressed-under outer seam allowance. Instead of flipping the facing to the inside, I flipped to the outside and then top-stitched it in place. It was a bit of a mind-bender as the facings had to be sewn right side to the wrong side of the bodice. After these CF bands were in situ, I stitched two lengths of black ribbon 1.5cm down from the neck edges; these would form the ribbon neck ties.

Finally, there was the collar band. I followed the same process of tracing off the band shape from the neck edges of my bodice pieces (including the added seam allowance at the CF), then added a seam allowance along the bottom/outer edge before stitching the shoulders. As that outer edge was all curved, I used a bias binding finish to turn it under, and then I basted the entire collar band in place around the neckline, matching the raw edges of the collar to the raw edges of the dress and leaving a 1.5cm overhang at the CF.

Then I cut the Park Lane neck facings from the black silk – as with the front bodice I cut two pairs with a CF seam allowance rather than the single front facing – interfaced it and overlocked the bottom edge. The next step thus was to face the neckline as per the pattern instructions, only including an additional vertical line of stitching down the CF, taking care to only stitch through the facing and the band. Finally, I top-stitched the collar band in place, which secured the facing on the inside.

It was fiddly at times, with the silk, but I’m delighted with the result. The linen gives it the easy sort of glamour that could be dressed up to wear to a wedding, or dressed down for a wander around the market. I’m sorry I completely failed on taking photos of the construction, but if anyone would like a more detailed sew-along I think I’d happily make another! I feel another fabric quest coming on…
You can buy the Park Lane Blouse and Dress pattern here for sizes 6–20 and here for sizes 16–28.

